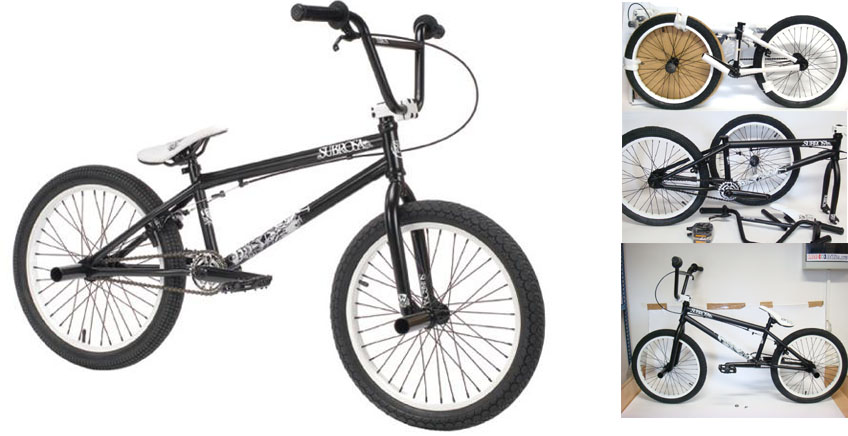
This article is based on a frequently asked question: In what condition am I going to receive my complete bike?
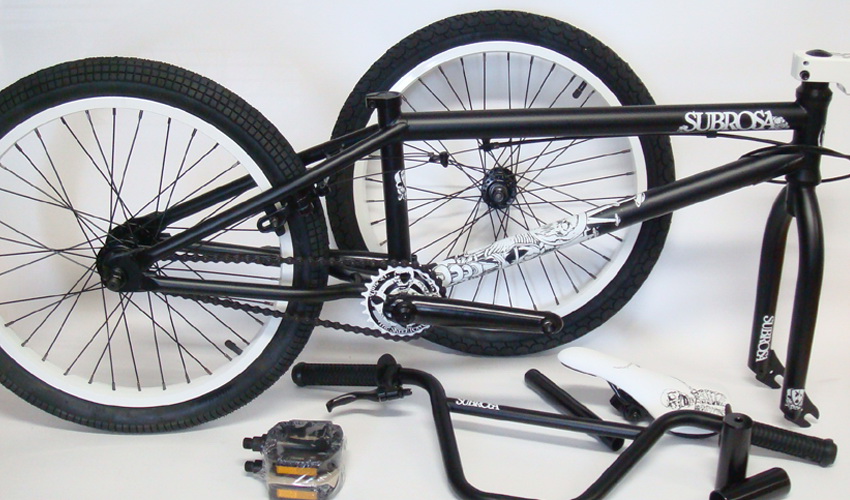
Well, the most simple answer is - exactly how you see it on on the picture bellow, packaged in the paper box. Before you will be able to ride it, it's obvious that some parts will need to be installed and few adjustments will need to be made. How to do it is explained step-by-step bellow.
CAUTION: These instructions are to be used as a sample guide only. Improperly installed parts may lead to severe injury or harm. We strongly recommend that you let a properly trained bike mechanic handle all installations, adjustments and repairs on your bike. As always...Ride Safe!
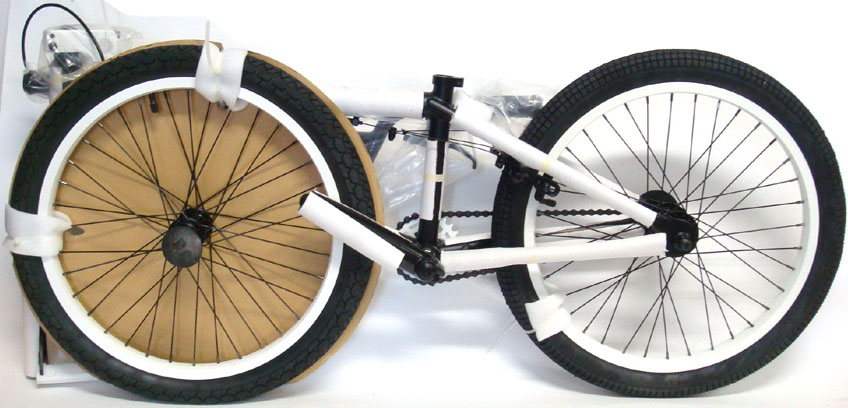
This is how every complete bike looks after you take it out of the box.
UNBOXING
Please read the warranty card and user manual carefully before you start with anything else. You will find it inside the box together with the invoice.
It is neccesary to read the warranty card and user manual carefully.
We strongly recommend you to consider whether you are able to assemble the bike on your own and accept the possible consequences of warranty claim rejection due to the incorrect set up or you will leave it to a specialist.
In case you are 100% sure that you can assemble it yourself, fill in the warranty form (page no.1, middle part) and proceed.
You can always leave this job to some quality bike shop from your neighbourhood and let them put it together the right way. Don't forget to let them fill your warranty card as well.
If you decide to put the bike together on your own, even though it's your first time, then try to avoid the mistakes mentioned in this article.
PREPARATION
0. Let's say you have just received an undamaged box from the carrier (GLS, DPD, PPL etc..). First thing you need, is to have enough space for the whole process of unboxing and building up the bike somewhere in your house/garrage, the building space should have enough lighting and all necessary tools should be prepared here.
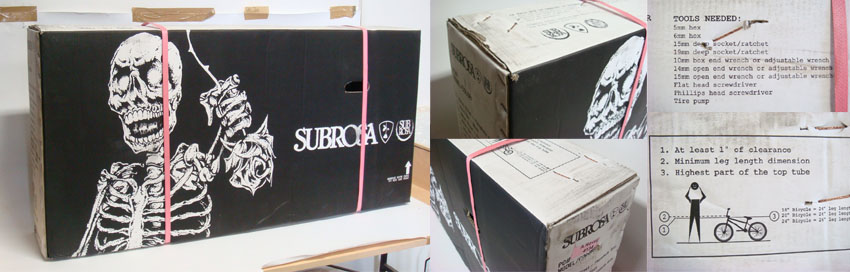
1. List of tools
- cutting pliers (to cut plastic straps)
- classic pliers
- allen keys: 5mm, 6mm, 8mm
- keys: 10mm, 13mm 14mm, 15mm, 17mm
- ratchet spanner with 15mm and 17mm nuts
- vaseline
- oil
- pump
- pen to fill up the warranty card
First take out the warranty card, then the bike. Then use the cutting pliers and cut of all strapping tapes on the box.
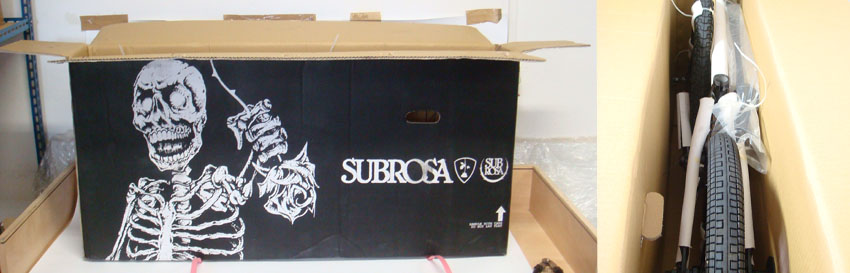
2. Fill up the warranty card on a first page and in case the invoice number is missing, fill it in please. After you unpack the box, use the cutting pliers and carefully remove the strapping tapes and all the plastic/paper covers.
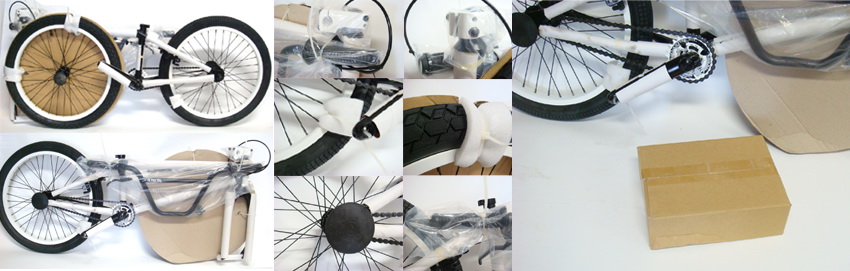
3. Take out the small paper box on the bottom, open it and firstly get rid of the plastic chain cover + reflectors because you won't need those.
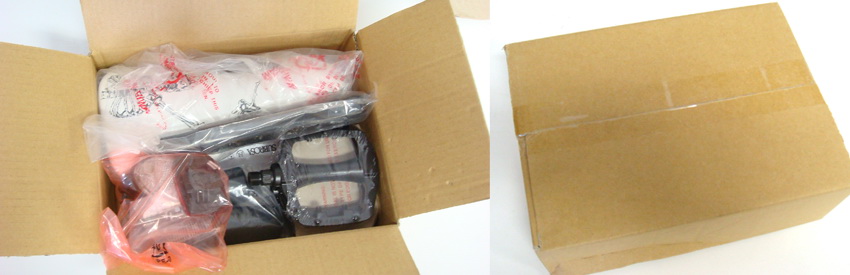
Small paper box contains:
- seat + seatpost
- pedals
- reflectors + chain cover
- user manual
- brake cable ends
4. Now you have everything ready to begin building your bike. Use the common sense and follow the tips and tricks mentioned bellow. Do not ever use too much force when tightening, screwing etc.. Lube everything well before assembling parts together (except handlebars mounting area and seatpost). When the bike is completed, double check all the screws/nuts if they aren't still loose, if yes, tighten them up.
I. HANDLEBARS + STEM ADJUSTMENT
Start with handlebars. Take the bars out of the plastic cover. Remove all 4 front/top (frontload/topload) allen key bolts from the stem and insert handlebars, attach the front/top faceplate and screw the bolts back in.
.jpg)
3 basic rules:
a) be carefull when centering handlebars in the stem
b) precisely set the handlebars angle, usually parallel with the fork
c) always tighten up the screws "in cross" (1,4,2,3). More in the TBB-BIKE warranty card, page 4.
Useful note: For longer lifespan of a stem and easier future demontage/montage, use a bit of vaseline on the stem bolts as well.
II. SEAT + SEATPOST ADJUSTMENT
Moving on, you will now connect the seat and the seatpost, which you found in the small paper box. Seat has to be tightened up to the seatpost very well, this is usually already done by the manufacturer and all you will have to do is to insert the seatpost into the frame and tighten it up. However, some manufacturers provide it separately and in which case, you will have to put it together yourself.
.jpg)
There are two types of seat+seatpost joint:
- rails: put the seat onto the seatpost and tighten up both 14mm key bolts on the lock
- pivotal: the seat is equipped with serrated oval plate on the bottom with 6mm allen key bolt in the middle. Screw this allen key bolt inside of a pivotal seatpost (features an oval counterpart compatible with the pivotal seat's bottom) and tighten it up.
Always set the ideal seat angle (front part of the seat is supposed to be slightly higher than the rear one). The best way is to have your seat + seatpost already mounted on a bike and then set the angle. There is a "maximum slide out" mark on every seatpost that you always have to follow to avoid potential injuries. Seatpost is tightened up to the frame thanks to the seatclamp with 5mm/6mm allen key tightening bolt.
III. PEDALS + CRANKS
Pedals comes in the small plastic box and are always left and right side oriented. The SIDE MARK L (left) or R (right) is always placed on the axle either near the threading or from the side. Before mounting your pedals into the cranks, use a bit of vaseline for both axles.
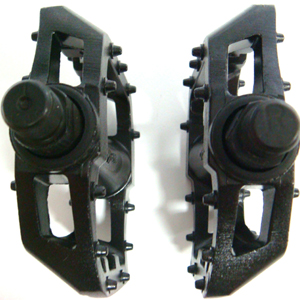
Note: Also the pedal axle threading is side oriented. If you want to be sure what is the direction of tightening up of pedal into the crank arm, always tighten the bolts towards the front wheel.
Keep your pedals tightened up at all times, because if you keep riding with loosen pedals for longer periods, the insert with threading will get destroyed.
To tighten up your pedals, use the 15mm key.
Pedal pins can cause a lot of unpleasant shin injuries, which is why we recommend you to get yourself some protection first.
IV. FRONT WHEEL + FORK
The front wheel has to be in the centre of the fork and always tightened up strongly. In case you want to ride with pegs, don't forget to remove the spacer on the axle which is under the tightening bolt (common mistake).
 |
.jpg) |
Every once in a while spokes will loosen up which affects the overall stability of your bike. That's why you have to maintain all the spokes tightened up at all times. The wheel must always have all spokes laced in and tightened up! Loosen spokes or bent/crooked rims are both caused by regular usage and it's not an allowable warranty claim subject matter.
The Rim itself have a huge impact on braking effectiveness, therefore it has to be maintained clean and undamaged. Most of coloured rims will get their braking area surface scraped after a while and loose the colour. For these cases the warranty claim is not acceptable.
When inflating your tires, follow the PSI(max pressure) value on the side of the tire and always maintain this pressure, unless you already know what is your ideal value. Particularly folding tires have to be inflated to the maximum pressure at all times, otherwise they will get damaged quickly.
V. PEGS
Classic BMX bike usually features 4 pegs, but this is freestyle, there are loads of riding styles, which means some people got used to riding with only two pegs. Let's say you are one of those and want to ride with two pegs only. First think you need to do is stand on your bike and ride around to see which leg do you have in the front position, as that is the side you are going to have pegs on. Take of the nuts and spacer from your wheel, insert the peg and use the ratchet spanner with 17mm nut to tighten it up.
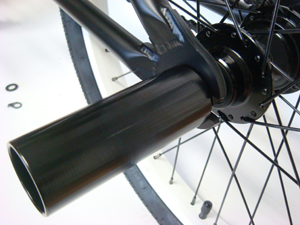
Leaving spacer between peg and frame dropout is a common mistake that has to be avoided.
The rear wheel has to be centered in the middle before tightening up, otherwise it will be impossible to set up the rear brake correctly.
VI. REAR BRAKE SET UP
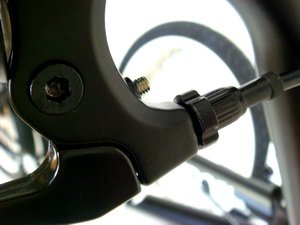
BRAKE LEVER:
- slightly rise up the brake lever as it is usually set too low from the manufacturer
- tighten the arresting bolt strongly (see the picture on the left)
- use oil to lube the whole brake cable
To set up your brake follow the steps below:
- loosen the allen key bolts in the u-brake by using the 6mm allen key and 13mm/14mm key
- remove both jaws from pivots, put some vaseline on them and than put the jaws back, screw the bolts back in but do not tighten them up yet
- set up the brake pads in a following way - loosen it up, push the brake jaws towards the rim and correct the brake pad position so it is fully touching the rim's wall. - - repeat on other side
- when both brake pads are perfectly touching the rim walls, it's time to tighten the brake springs. Use the 13mm/14mm key and tighten the spring so the brake jaw easily pops back to it's original position after you have pushed it towards the rim. Do not over tighten the springs because brake will be running too hard. Play with it until it works super easy.
- after the correct spring set up, tighten the allen key bolt
- repeat the same procedure on the other brake jaw while trying to set it up in exact same way to make it work the best
note: It is reccomended to use GEL brake pads instead of hard ones.
BRAKE CABLE:
- when you are assembling the brake parts, it's better to have the whole brake cable lubed with some oil (gets more easily through the whole cable).
- when setting up brake cable, keep the top arresting bolt scewed all in and the bottom one half screwed. Thanks to this you will be able to tighten/loosen the brake to it's original state.
- final step when setting up your brake is cutting of the unncecesary pieces of cable throughout the whole braking hardware. Leave at least 1.5cm reserve.
VII. Now to be sure your bike is 100% ready to be ridden, double check every part/bolt/nut and tighten it up if neccesary.
VIII. IMPORTANT NOTE
Now you have built your BMX bike. After a week or two of riding, you will have to take the bike to the seller for warranty inspection. Keep your basic tools always with you so you are able to tighten up anything on your bike that loosens up during session.
Common things that happens after the first days of riding your new complete bike:
- basically every part on bmx bike needs to be tightened up every once in a while, that's why it's the best to keep your tools always with you
- loose chain (your will have to loose up the rear tire and move it backwards to tighten up the chain again)
- loose spokes (keep the spokes tightened at all times to make your rims last longer)
- loose brake cable (you need to set up the whole brake hardware again)
- loose sprocket bolt
- loose cranks
If case you would like to ask some question or have an idea on how to improve this section, please leave us a message at order@tbb-bike.com
More info in the warranty card and user manual.
Created by the TBB-BIKE CREW


